
Introduction: Why WordPress and Hostinger Are a Perfect Match
If you’ve decided to build a website in 2026, there’s a very good chance you’ve already heard two names more than any others: WordPress and Hostinger.
WordPress powers over 43% of all websites on the internet — from personal blogs and small business sites to major news outlets and online stores. It’s flexible, beginner-friendly, and backed by the largest web ecosystem in the world.
Hostinger, on the other hand, has quickly become one of the most popular web hosting providers for beginners and professionals alike — known for its affordable pricing, blazing-fast servers, and an intuitive control panel called hPanel that makes managing your website surprisingly simple.
Put the two together and you have a powerful, affordable, and easy-to-manage setup that works for almost any type of website.
In this guide, you’ll learn exactly how to install WordPress on Hostinger — from logging into your account for the very first time to having a fully configured WordPress website ready to customize. No technical experience required.
I First time buying hosting? → How to Choose a Web Hosting Provider: 12 Factors to Check
What Is Hostinger WordPress Hosting?
Before we get into the steps, let’s quickly clarify what you’re working with.
Hostinger is a web hosting company founded in 2004, now serving over 3 million customers across 150+ countries. They offer a range of hosting products — shared hosting, VPS, cloud hosting, and dedicated WordPress plans — all accessible through their proprietary control panel, hPanel.
Hostinger WordPress hosting refers specifically to their hosting plans that are pre-optimized for WordPress websites. These plans typically include:
- One-click WordPress auto-installer
- LiteSpeed servers (significantly faster than standard Apache)
- Pre-installed LiteSpeed Cache plugin for speed optimization
- Free SSL certificate
- Free domain on annual plans
- Automatic WordPress updates
- WordPress-focused support team
Even their standard shared hosting plans support WordPress fully and come with the same one-click installer, making them a great starting point for beginners on a tight budget.
The key advantage of the Hostinger WordPress setup is that it removes the technical complexity entirely. You don’t need to manually download WordPress files, configure a database, or edit configuration files. The installer does it all in under two minutes.
GET YOUR PLAN NOW : HERE
Step-by-Step: how to install wordpress on hostinger
Let’s walk through the complete installation process from start to finish.

Step 1: Log In to Your Hostinger Account
If you haven’t purchased a Hostinger plan yet, head to hostinger.com and sign up for a plan. The Single Web Hosting or Premium Web Hosting plan works well for beginners.
Once you have your account:
- Go to hpanel.hostinger.com
- Enter your registered email address and password
- Click Log In
You’ll land on the Hostinger dashboard — this is the main hub where you manage everything related to your hosting account.
Step 2: Access hPanel — Hostinger’s Control Panel
Hostinger uses their own custom control panel called hPanel instead of the industry-standard cPanel. Don’t worry — hPanel is actually more intuitive for beginners and covers everything you need.
From your dashboard:
- Click on Hosting in the top navigation bar
- You’ll see a list of your active hosting plans
- Click the Manage button next to the plan where you want to install WordPress
This takes you into hPanel — the full control center for your hosting account. From here you can manage files, databases, email, domains, and everything else related to your website.
Take a moment to look around. You’ll notice sections like Website, Files, Databases, Emails, and Domains — all clearly labeled and easy to navigate.
Step 3: Install WordPress Using the Auto-Installer
This is where the magic happens. Hostinger’s auto-installer sets up a complete WordPress installation in about 60 seconds.
- Inside hPanel, look for the Website section
- Click on Auto Installer (some versions of hPanel show this as WordPress directly under the Website section)
- You’ll see a list of applications — click the WordPress icon
- Click Select or Install to begin
You’ll now see the WordPress installation configuration screen. Fill in the following details:
Website URL: Choose the domain where you want WordPress installed. If you only have one domain, it will be pre-selected. You can also install in a subdirectory (e.g., yourdomain.com/blog) if you want WordPress on a specific section of your site rather than the root.
Administrator Username: Choose a unique username for your WordPress admin account. Avoid using “admin” — it’s the first thing hackers try.
Administrator Password: Create a strong password (mix of letters, numbers, and symbols). Hostinger will generate a strong one for you if you prefer.
Administrator Email: Enter a real email address you have access to — this is how WordPress sends password reset links and important notifications.
Website Title: Enter the name of your website. Don’t overthink this — you can change it later in WordPress settings.
Website Language: Select your preferred language.

Once everything is filled in, click Install. Hostinger will now automatically:
- Create a MySQL database for WordPress
- Download and install WordPress files
- Configure the database connection
- Set up your admin account
The whole process takes 30–90 seconds. When it’s done, you’ll see a confirmation screen with two important links:
- Website URL — the public-facing address of your site
- Admin URL — your WordPress dashboard login (usually yourdomain.com/wp-admin)
Save both of these links somewhere safe.
Step 4: Log In to Your WordPress Dashboard
- Click the Admin URL link from the confirmation screen (or type yourdomain.com/wp-admin in your browser)
- Enter the username and password you set during installation
- Click Log In
Welcome to WordPress. You’re now looking at the WordPress admin dashboard — the control center for your entire website. From here you can write content, install themes, add plugins, and manage every aspect of your site.
Step 5: Configure Your Essential WordPress Settings
Before you start building, take five minutes to configure the core settings. These are easy to overlook but important to get right from the start.
Set Your Permalink Structure
Permalinks are the URL format for your pages and posts. The default setting is messy (yourdomain.com/?p=123). Change it to something clean.
- In WordPress dashboard, go to Settings → Permalinks
- Select Post name (gives you yourdomain.com/post-title format)
- Click Save Changes
Connect Your Domain (If Not Already Done)
If you bought your domain through Hostinger, it’s likely already connected. If your domain is registered elsewhere:
- Go to hPanel → Domains
- Find your domain settings and update the nameservers to Hostinger’s (ns1.dns-parking.com and ns2.dns-parking.com)
- DNS propagation can take up to 24–48 hours
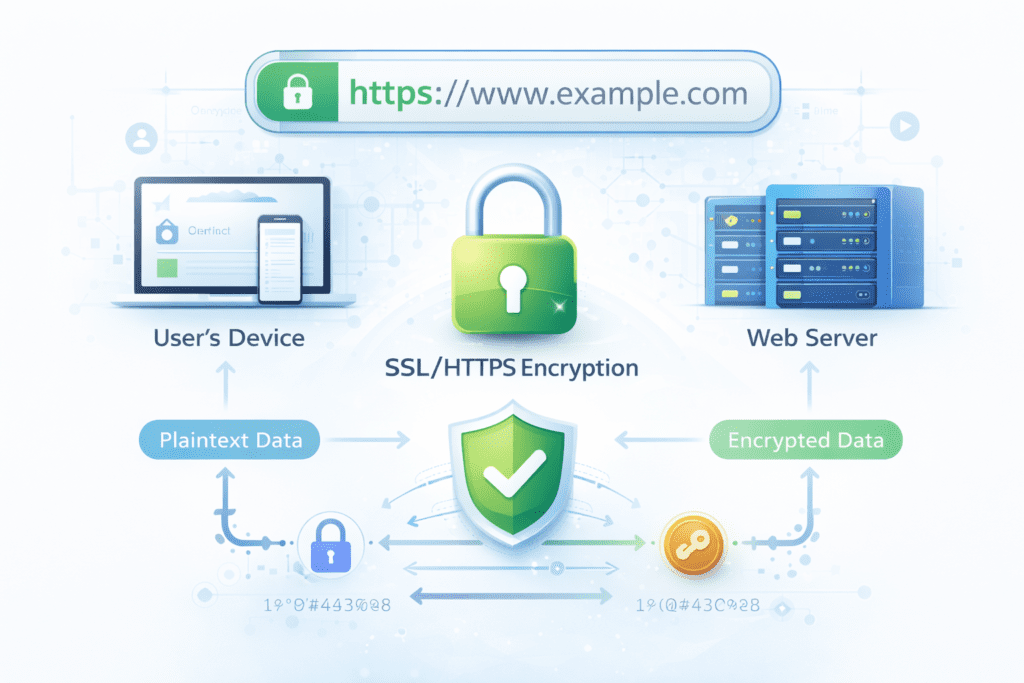
Activate Your SSL Certificate
SSL is what gives your site the https:// prefix and the security padlock. Hostinger provides free SSL via Let’s Encrypt.
- In hPanel, go to SSL
- Click Install SSL next to your domain
- Once installed, go to WordPress Settings → General and change both URLs from
http://tohttps://
how to install wordpress on hostinger
How to Set Up Your First WordPress Website
With WordPress installed and configured, here’s how to get your first website up and running quickly:
Install a Theme
A theme controls how your website looks. Go to Appearance → Themes → Add New and search for a theme that fits your style. Popular free options for beginners include Astra, GeneratePress, and Neve — all fast, flexible, and beginner-friendly.
Install Essential Plugins
Plugins add functionality to your WordPress site. Start with these must-haves:
- LiteSpeed Cache — already installed on Hostinger WordPress plans; dramatically improves speed
- Rank Math SEO — helps optimize your content for Google
- WPForms Lite — creates contact forms in minutes
- Wordfence Security — adds an extra security layer
- UpdraftPlus — automated backup solution
Go to Plugins → Add New, search for each by name, click Install Now, then Activate.
Create Your Core Pages
Every website needs a few essential pages. Go to Pages → Add New and create:
- Home — your main landing page
- About — who you are or what your business does
- Contact — how people can reach you
- Blog — where your articles will live (if applicable)
Once created, set your homepage by going to Settings → Reading and selecting a static page if you want a custom homepage instead of a blog feed.
Bluehost Hosting Plans (2026): Which Plan Should You Choose?
Common Mistakes Beginners Make on Hostinger WordPress
1. Using “admin” as their username. It’s the most commonly targeted username in brute force attacks. Choose something unique during installation — and if you already used “admin,” create a new admin user and delete the old one.
2. Skipping SSL activation. Some beginners assume SSL is automatic. On Hostinger it’s free but requires manual activation in hPanel. Without it, browsers flag your site as “Not Secure” — which destroys visitor trust and hurts Google rankings.
See: SSL Certificate (HTTPS): The Complete Guide to Securing Your Website & Building Trust 2026
3. Not changing the default permalink structure. Leaving permalinks set to the numeric default (?p=123) makes your URLs ugly and unreadable. Switch to “Post name” immediately after installation.
4. Installing too many plugins at once. Beginners often install 20+ plugins in the first hour. Each plugin adds code that can slow your site and create compatibility issues. Start with five essential plugins and only add more when you have a specific, clear need.
5. Ignoring backups. Hostinger does create backups, but having your own independent backup plugin (like UpdraftPlus) gives you complete control over your restore points. Set it up in week one.
6. Not updating WordPress, themes, and plugins. Outdated software is the most common cause of hacked WordPress sites. Enable automatic updates or check for updates manually every week.
how to install wordpress on hostinger
Advantages of Using Hostinger for WordPress
Here’s why Hostinger WordPress setup is one of the most popular combinations in web hosting today:
Speed: LiteSpeed servers with built-in caching deliver significantly faster load times than traditional Apache servers — crucial for both user experience and SEO.
Pricing: Hostinger offers some of the most competitive pricing in the industry, with WordPress-ready plans starting under $3/month on promotional rates.
Ease of Use: hPanel and the one-click installer mean you can go from signing up to having a live WordPress site in under 15 minutes — no technical knowledge needed.
Free SSL: Every plan includes a free Let’s Encrypt SSL certificate — no additional cost, no complicated setup.
Performance Monitoring: hPanel includes built-in performance and uptime monitoring tools, so you can keep an eye on your site’s health without third-party tools.
24/7 Support: Hostinger offers round-the-clock live chat support with a team specializing in WordPress — helpful for beginners who inevitably run into questions.
WordPress Staging: Higher-tier plans include staging environments, letting you test changes before pushing them live — a feature usually reserved for premium managed WordPress hosts.
Internal Link Suggestion: Making a comparison? → Hostinger vs Bluehost: Which Is Better for WordPress Beginners?
Frequently Asked Questions
Q1: How long does it take to install WordPress on Hostinger?
The actual installation takes 60–90 seconds using Hostinger’s auto-installer. From logging into hPanel to having a functional WordPress site live, most beginners complete the process in under 10 minutes.
Q2: Is Hostinger good for WordPress beginners?
Yes — Hostinger is one of the most beginner-friendly hosting providers specifically for WordPress. The hPanel interface is clean and intuitive, the auto-installer removes all technical setup, and their support team is available 24/7 via live chat.
Q3: Does Hostinger install WordPress automatically?
Hostinger does not install WordPress automatically on all plans, but the one-click auto-installer in hPanel makes it extremely fast and simple. Some plans offer a “WordPress Pre-installed” option during signup that handles it before you even log in for the first time.
Q4: Can I install WordPress on Hostinger for free?
You cannot host a website for free on Hostinger — their plans are paid. However, their entry-level plans are among the most affordable in the industry. Once you have a hosting plan, installing WordPress itself is completely free.
Q5: What if I already have a WordPress site elsewhere — can I move it to Hostinger?
Yes. Hostinger offers free website migration on most plans. You can also migrate manually using the All-in-One WP Migration plugin, which exports your entire site (content, themes, plugins, settings) and imports it into your new Hostinger WordPress installation in a few clicks.
Q6: Does Hostinger support WooCommerce for online stores?
Absolutely. WooCommerce is a WordPress plugin, and any WordPress installation on Hostinger fully supports it. Hostinger also offers dedicated WooCommerce hosting plans with pre-configured settings optimized for e-commerce performance.
Conclusion: You’re One Click Away From Your WordPress Website
Learning how to install WordPress on Hostinger is one of the easiest first steps you can take toward building an online presence — and as you’ve seen in this guide, it takes less than 15 minutes from start to finish.
The combination of Hostinger’s hPanel and WordPress’s one-click installer removes every technical barrier that used to make starting a website intimidating. You don’t need to touch a database, edit a configuration file, or understand server management. You just follow the steps, fill in a few fields, and click install.
From there, the rest is about building — choosing a theme that reflects your brand, adding plugins that extend your site’s capabilities, and creating content that connects with your audience.
Your website is waiting. Log into hPanel and get started today.